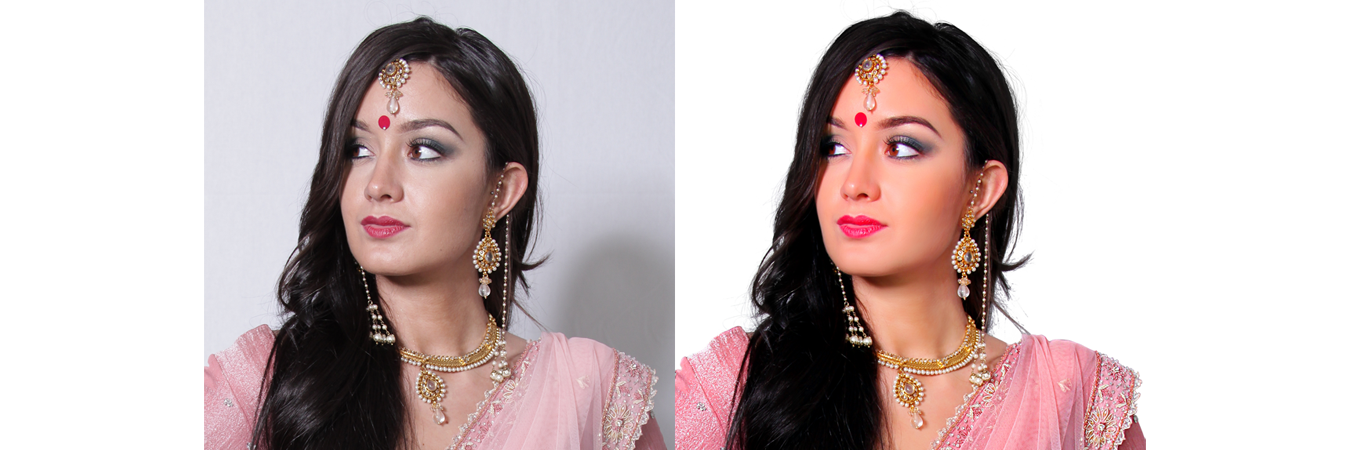
Clipping path is a closed vector line, or shape, that shows where to clip out a 2D image in image editing software. It is usually used by editors to remove the background of an image. However, you can you it for removing something more, like drop shadow, donut shapes, words, and lots more. With the use of clipping path, you can also remove virtually any part of an image as required, as you will see that anything outside the path will be omitted on the output image. When using it in the Photoshop software, the path goes through the image file, and you can activate it and turn it into a standard selection tool for soft-edge feathering, filtering and some other features. In newer versions of the software, you can hide and save paths within Jpeg files, then pick up them up and utilize them for a full or a clipped version of an image when choosing a layout.
Making a clipping path in Photoshop is not difficult as it seems to be. You just have to follow its modus operandi, which is as follows:
- Open the Photoshop software on your computer and open the image that you want to edit. On the left corner of the top menu bar, then pick Pen tool and the Path option. Do not pick the shape layers’ option, or else you will end up getting a color-filled and stroked shape.
- Zoom in your image as much as you want, so as to aid your work. It helps you to see the edges of what you are tracing better. It can be at least 100% zoom and at most 600%, however, 300% is usually suitable for work.
- Begin from a point. Then, trace all around the image until you re-connect the paths with the starting point. As you trace, ensure that you keep just inside the image edge so as to make the cut-out definite and free of halo from the background.
- After getting your path ready, the first thing you will have to do is to save your Path. Go to Paths palette and click on Save Path. Save the path with a name in a JPEG format.
- Click on the right hand submenu in the Path palette pop-up menu, select clipping path option. Then, choose the name of your path (that is the one which you just saved) from the dropdown menu.
- Select the pixel value of your choice on the flatness-device pixel box.
- Click on OK to clip away the background.
- Go to File, select Save as… and save the file as JPEG.
- You now have new image that has no background. That is, you have successfully clipped out the image from its background.
This method is most suitable for clipping out objects or images that has distinct edges, rather than objects that are of semi-transparent materials, frizzy hair, flowing or other soft edges, as the case may be. Clipping path is not a long process. It is something that you can complete within 10 minutes and it is very easy to use.